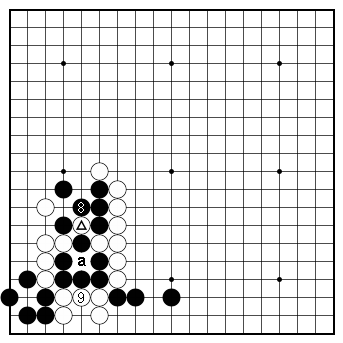
Dia. 1. Correct |
Dia. 1. The wedge-in tesuji If you know your tesujis, the wedge-in (warikomi) of Black 1 is the first move that will grab your attention. It is in fact the correct move. Black has two ways to answer, at 'a' or at 'b'. Black 'a' offers the strongest resistance. If Black plays 'b', his stones will quickly be captured. So let's first look at the variations generated by Black 'a'. |
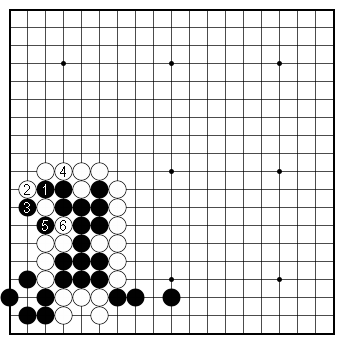
 Dia. 2 |
Dia. 2. Another wedge-in tesuji After Black 2, White blocks with 3 and Black captures a stone with 4. At this point, White must be careful. Cutting at 'a' would be a mistake. Instead, White must play another wedge-in (hanekomi) move from above with 5. This move prevents Black from getting out into the center. Black has two options: to atari at 'b' or to atari at 'c'. Instead of 5 — |
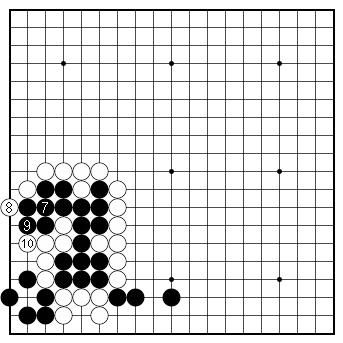
 Dia. 3 |
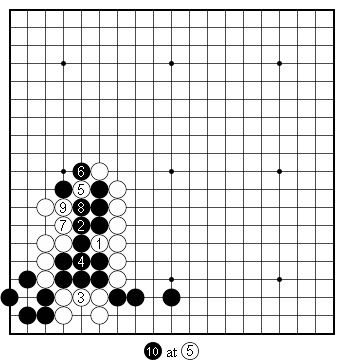
Dia. 3. Black escapes. This position is similar to the 'cranes nest', which was explained in Dia. 3 of Instalment #2. The usual continuation for White would be to squeeze Black with 1 and 3. After White connects with 4, White 5 is the only move that keeps up the pressure. Black ataries from above with 6 and White squeezes with 7 and 9. But, after connecting with 10, Black has escaped into the open. Therefore, Black cannot play this way. He has to play 5 in Dia 2. |
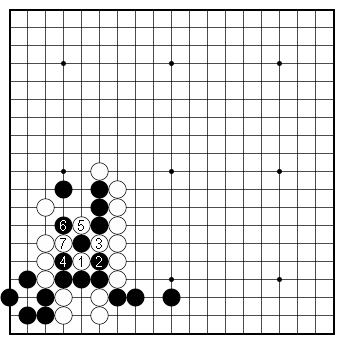
 Dia. 4 |
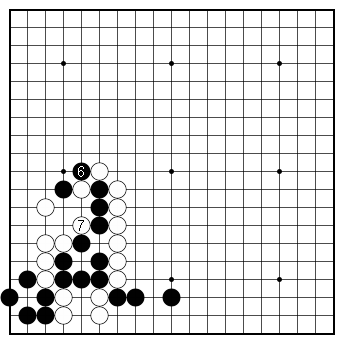
Dia. 4. Atekomi: a hard move to see After Black 5 in Dia. 2, suppose Black ataries on top with 6. The atekomi tesuji of White 7 is the only move. Starting from Dia. 1, it is a hard move to see seven moves deep into the solution. Next — |
 Dia. 5 |
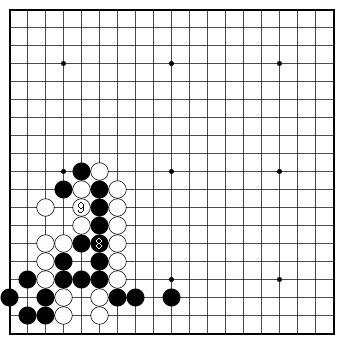
Dia. 5. Black's stones are captured. If Black connects at 8, White connects at 9 and the black stones are captured. |
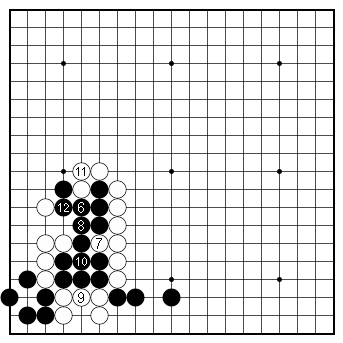
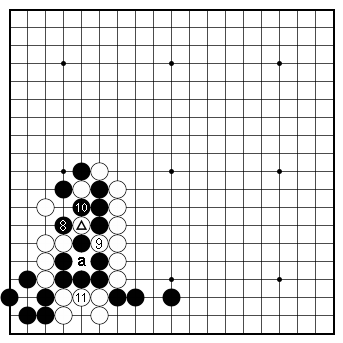 Dia. 6 |
Dia. 6. Connect and die If Black answers White 7 in Dia. 4 with the atari of 8, White cuts with 9 and ataries with 11. Black can't connect at 'a' because White will capture at the marked stone. If Black connects at the marked stone, White will capture at 'a'. Therefore, Dias. 5 and 6 show that Black 6 in Dia. 4 fails. Let's go back to 'c' in Dia. 2. |
Recommended reading Being able to solve problems such as the one above or to find those winning moves in difficult positions that arise in your own games requires a familiarity with all the standard tesuji. You can acquire this familiarity by working through the problems in A Survey of the Basic Tesujis , and then follow it up with Five Hundred and One Tesuji Problems. The latter book starts off with a complete list of the 45 standard tesujis. Multiple problems for each are randomly presented throughout the book, just as they would randomly arise in a game. Kyu players who seriously studied these books would gain a lot of facility and flexibility in their fighting skills and would surely improve by two or three handicap stones. Of course it cannot be overemphasized the importance of solving life-and-death problems for improving your reading skills, but I will discuss this topic in the next instalment. |