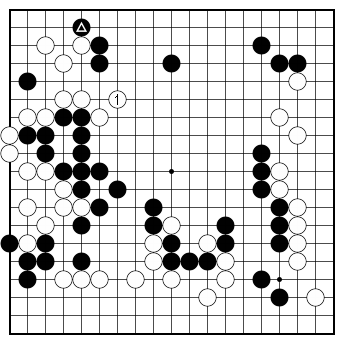
 Dia. 1 |
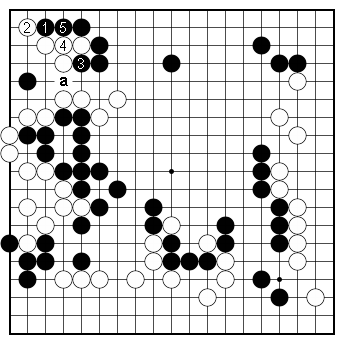
Dia. 1. Correct White should ignore Black's move at the marked stone and play the diagonal connection of 1. This move goes a long way in neutralizing Black's thickness below as well as separating it from his stones at the top. |
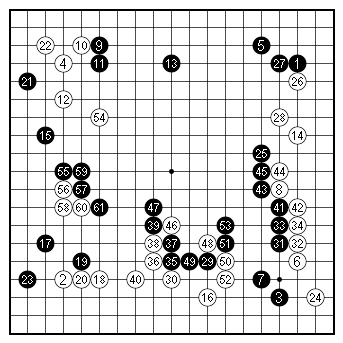 Figure 1 (1–61). |
Figure 1 (1–61). The side attachment The position in the problem diagram arose in a game between Nyu Eiko 4-dan (white) and Numata Sakiya 6-dan in the first round of the 71st NHK Cup, broadcast on TV on May 28, 2023. Nyu is a disciple of Michael Redmond 9-dan and is the holder of the Senko Cup, the most prestigious Japanese women's title (first prize is 8,000,000 yen). White invaded Black's moyo on the right side with the attachment of 56. After Black 61, White's three stones are isolated inside Black's sphere of influence and they have to find a way to make eyes or to link up with some of their allies elsewhere on the board. |
 Figure 2 (62–87) |
Figure 2 (62–87). White links up. With the moves to 86, White has managed to link up his stones and deny Black the territory on the left side. In the process, however, Black has been able to thicken his position on the left side facing the center. Instead of capitalizing on this thickness by cutting at 'a', Black makes an endgame move with the hane of 87, perhaps hoping to further reduce White's territory on the left side. It seems that Black has become so fixated on attacking White's position on the left side that he is no longer aware of the global situation. |
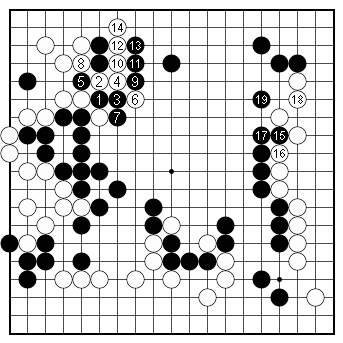
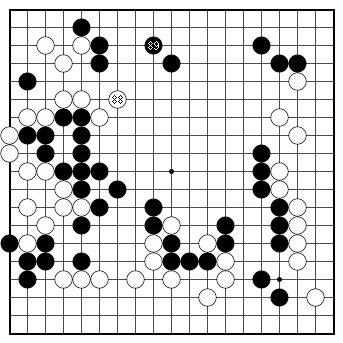 Figure 3 (88–89) |
Figure 3 (88–89). Defending the top White defends against the cut with 88. She is obviously aware of the strategic importance of this cut. White 88 also threatens to invade the top, so Black defends with 89. |
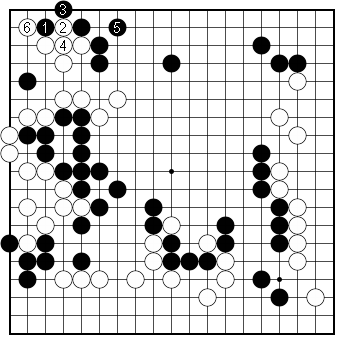 Dia. 2 |
Dia. 2. A better way to defend Instead of 89, a better way to defend the top would be for Black to attach at 1. After White connects at 4, Black connects at 5, which makes a deep white invasion unlikely. White might be compelled to atari at 6, as a black move there would be quite big, in which case Black would end in sente. |
 Dia. 3. |
Dia. 3. Bad aji Instead of 2 in Dia. 2, White must not answer Black ‚P with the hane of 2. Later, Black might be able to play at 'a' and exploit the bad aji in the corner. |
 Dia. 4 |
Dia. 4. How Black should have played. Instead of 87 in Figure 2, Black should have cut with 1. The moves to 14 could be expected. Black could then fix up his shape on the right side with 15 to 19, ending up with a vast valley of territory in the center of the board and a won game. |
 Figure 4 (90–131). |
Figure 4 (90–131). The endgame begins. With White 90, the endgame begins. Both sides are expanding their territories and reducing the opponent's. Compare the difference between Black's territory in the center in Dia. 4 and his center territory in this figure. This shows how big a move White 88 in Figure 3 was. After exchanging White 130 for Black 131 — |
 Figure 5 (132–171) |
Figure 5 (132–171). The last big points White and Black take the last big endgame points with the moves from 32 to 41. |
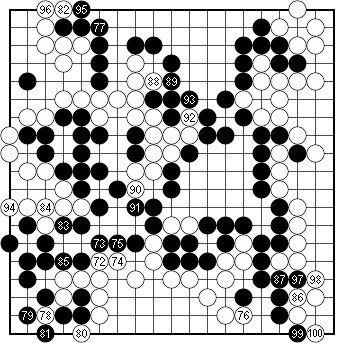 Figure 6 (172–200) |
Figure 6 (172–200). One- and two-point endgame moves Only one- and two-point endgame moves remain, which fix the borders of each side's territory. |
 Figure 7 (201–229) |
Figure 7 (201–229). White wins. 229 moves. White wins by 5½ points. |
|
|