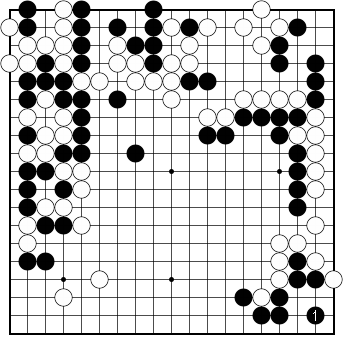
 Dia. 1 |
Dia. 1. Correct Black 1 is the correct way to answer. It is a quiet move that does not provoke White to add stones to his group above. |
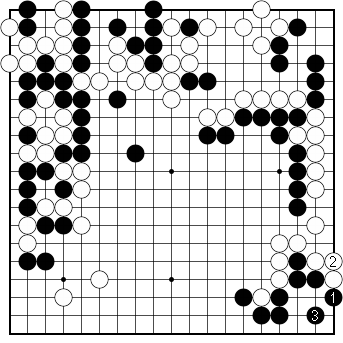 Dia. 2 |
Dia. 2. Standard endgame moves Black 1 and 3 are the standard endgame moves that secure the corner territory. However, it is still the middle game, so Black must think about this position differently than he would in the endgame. After Black 3 — |
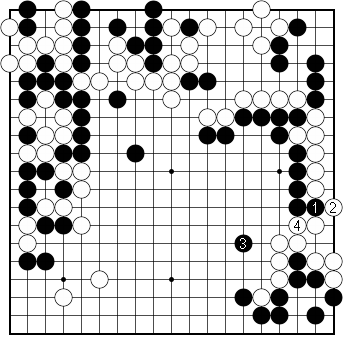 Dia. 3 |
Dia. 3. No attack If Black attacks with 1 and 3, his attack fizzles out when White makes two eyes for his group with 4. |
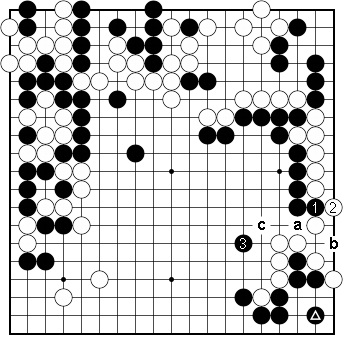 Dia. 4 |
Dia. 4. Two moves for one eye However, after Black plays the marked stone and follows up by attacking with 1 and 3, White needs two moves — 'a' and 'b' — to make another eye on the side. Therefore, White is forced to seek his second eye by running out into the center with 'c'. |
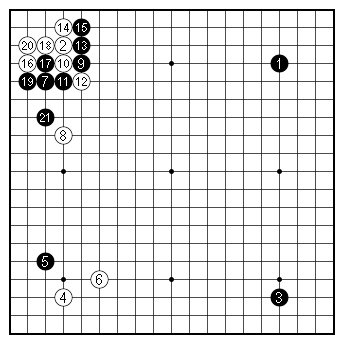 Figure 1 (1–21). |
Figure 1 (1–21). The descent The position in the problem diagram arose in a game between Shibano Toramaru Meijin (black) and Yuki Satoshi 9-dan in the second round of the 32nd Ryusei tournament, played on October 9, 2023. It was an interesting game from the begining to the end and it illustrated the power of Shibano's go against a formidable opponent. Blocking with Black 13 is a new move introduced by AI. And the descent of White 14 is also a new move that Yuki had obviously researched. Normally, White would play 14 as a hane at 15. Shibano briefly discusses this joseki in The bottom line is that Black 13 leads to difficult and large-scale josekis, so these days pros tend to avoid the two-space pincer of White 8. The fact that Yuki played White 8, along with 14, indicated that he had something up his sleeve. |
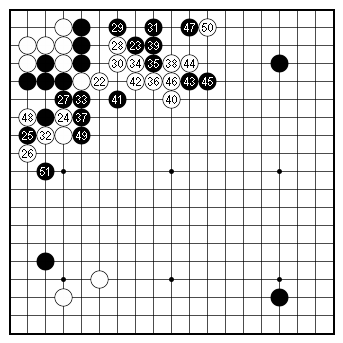 Figure 2 (22–51) |
Figure 2 (22–51). A sharp tesuji As expected, the fight spreads across the top and down the left side. Black 51 is a sharp tesuji, striking at a key point. |
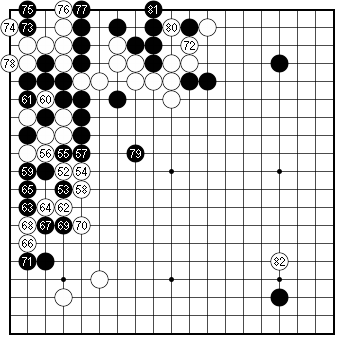 Figure 3 (52–82) |
Figure 3 (52–82). A bad result for White With 81, the fight comes to a pause and White switches to the bottom right with the high approach of 82. However, White hasn't come out of this encounter very well. Black has lived at the top and secured most of the territory on the left side. Furthermore, 79 gives Black a strong presence in the center. White is alive in the upper left corner but only in a seki. |
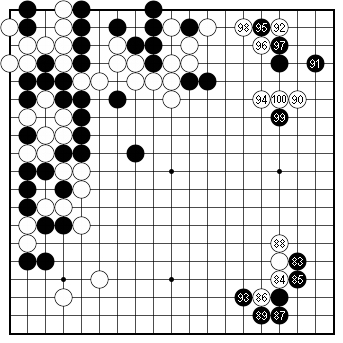 Figure 4 (83–100). |
Figure 4 (83–100). Securing the corners Black secures the lower right corner with the moves to 93. Next, White lays siege to Black's stone in the upper right corner with 92 to 98. After exchanging Black 99 for White 100 — |
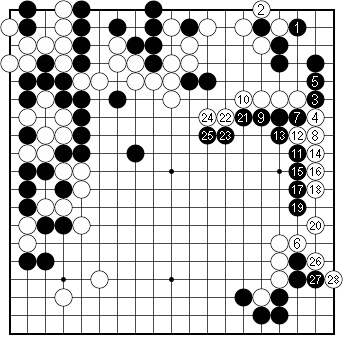 Figure 5 (101–128) |
Figure 5 (101–128). A weak white group Black secures the upper right corner with 1 to 5, then creates a weak white group with the moves to 19. He now expands into the center with the moves to 25. Next, White expands his eye space with 26 and 28 and we come to the problem in this instalment: How should Black answer White 28? |
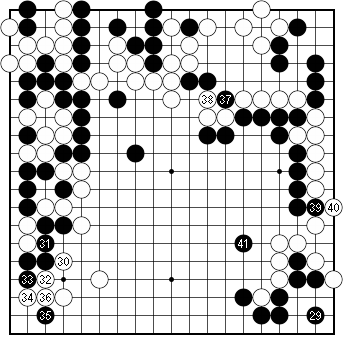 Figure 6 (129–141) |
Figure 6 (129–141). White's privilege After Black 29, White would like to play 30 at 39, but this move is essentially worth only one point in gote. If White is going to stay in contention, he has to play the biggest moves, which are securing the lower left corner with 30 to 36. In this sense, a move at 39 is Black's privilege. After exchanging 37 for 38, Black starts his attack with 39 and 41. Next — |
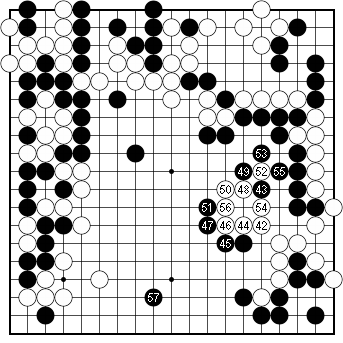 Figure 7 (142–157) |
Figure 7 (142–157). White's second eye White has to move into the center with 42. He manages to make his second eye with the moves to 56, but, in the process of his attack, Black has made a thick position in the upper right and a wall facing towards the left side, from which he makes an ideal extension to 57. Black's moves in this figure are an excellent example of gaining the advantage by attacking a weak group. |
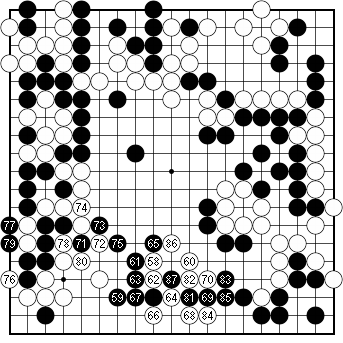 Figure 8 (158–187) |
Figure 8. (158–187). White resigns. After Black throws in a stone with 87, White's group cannot live, so he resigns. The move-by-move game record can be found at |
|
Recommended reading
This instalment's theme, 'avoid helping the opponent remove bad aji', is an important one that every dan-level player must instinctively understand. In his book |